| Home
| Recording With Capture4ME | Playback With Capture4ME | FAQ |
Our Other
Apps |
|
|
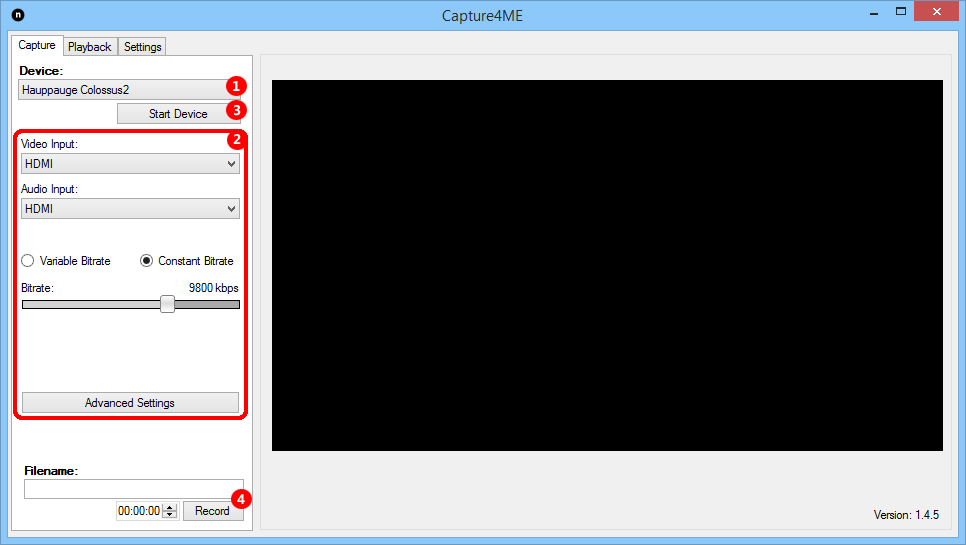
Capture4ME is designed to be easy to use. The markup on the screenshot below shows the typical steps you'd perform to get started:
|
|||||||
 |
|||||||
| 1.
Select Device The dropdown list will show all the devices detected in the machine. Use this to select which device you'd like to control. |
|||||||
| 2.
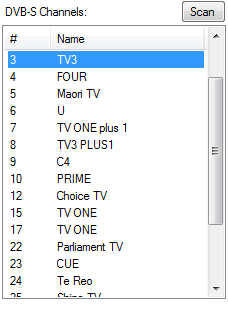
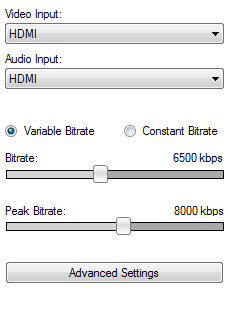
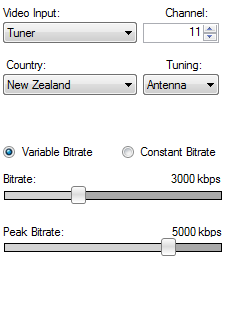
Configured Device The specific device settings shown will vary from device to device. Below are screenshots of the types of settings you can expect for each type of device. Encoder devices like the HDPVR typically show bitrate and input settings, whereas digital devices show channel lists and a 'Scan' button.
The 'Scan' button shows an easy-to-understand screen where you can enter the scanning parameters that apply to your device (like satellite selection for DVB-S, country and region for DVB-T, etc), then it progresses to searching for channels. |
|||||||
| 3.
Start Device Once you've selected your device, and selected the input/channel you want to watch, hit the 'Start Device' button and video will appear a few seconds later. |
|||||||
| 4.
Record If you want to capture what you're seeing on the screen, hit the 'Record' button and Capture4ME will start capturing video. While it's recording, in the lower-right of the screen you'll see continuously updated information about how long you've been recording, and the size of the file. Anything you've recorded will be available to playback on the 'Playback' tab. |
|||||||
|
Need to contact us? Click HERE to send us an email. |
|||||||